I used the Sangria papers this time and the Artistry Cricut Cartridge for the leaf & banner.
Here's the Cricut Design Space file. The acorn is from our Art Philosophy Cartridge.
If you don't have Design Space and an Explore, the Banner is 1.25" tall, the leaf is 2" and the acorn is 1.25"
Step 1: Cut 3 squares at 4" (You can cut them at 3" for a smaller place card.)
Score them corner to corner in just 1 direction. Fold lightly and open back up.
Step 2: Overlap 2 of the squares half way. The fold will line up with the edge of the other square.
Adhere with strong adhesive.
When you pull the first triangle over the last one, you'll get what we call a tee pee or tent.
Time to embellish. Cut square at 3.75" or 0.25" SMALLER than the base squares.
Now cut them into triangles.
Our SureCut Fiskars paper trimmer is great for this. The wire lines makes it so easy to line it up and know that you're getting a perfect cut. I've used mine for 3 or 4 years now.
Step 5 is to apply adhesive to the back. I love using a dot adhesive and our All-Purpose Mat. (Actually I use only half of our mat; it's so big that I cut it in half)
NOTHING sticks to it. And if it does, it comes up really easily. This helps me get adhesive to and over the edge of my paper without making a mess.
Repeat on all 3 large triangles. The last triangle gets a little bit of contrasting paper (or the same). I cut a 1.5" square diagonally to get this little triangle.
Now it's time to make your project stand up.
There's two ways to do it. One is with our Hook & Loop Dots (We can't call them Velcro (TM) because they're not made by Velcro Industries)
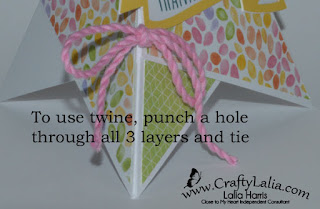
Another way to secure your flap is to punch holes through the 3 layers and tie with some extra thick baker's twine.
Now to embellish and enjoy!
I used the Etched Alphabet to stamp my name on the banner in Pomegranate ink.
I added a Gold Bling Gem for a bit of sparkle.
I created a smaller version starting with 3" squares of Kraft Cardstock.
The pattern paper is 2.75" with a 1" punched circle for the name from the Champagne Cardstock that is included in the Sangria paper pack and tied it closed with Poppy Extra Thick Twine.
If you are not going to re-use these place cards, you can also just adhere the flap with adhesive instead of tying or using our Hook & Loop Dots.
Be sure to check my previous post to see my first pyramid card.


No comments:
Post a Comment