Showing posts with label Card. Show all posts

Monday, December 6, 2021

FREE Pre-cut Project Kits in December!

Happy December Crafty Friends!  

It's a new month and I'm kicking off the new year a little early with a new rewards program!  

Each month you can earn a pre-cut card kit when you earn the Stamp of the Month for $5 or FREE!  

Here's this month's card kit featuring the Owls from Owl Love You Forever S2112, the December Stamp of the Month.


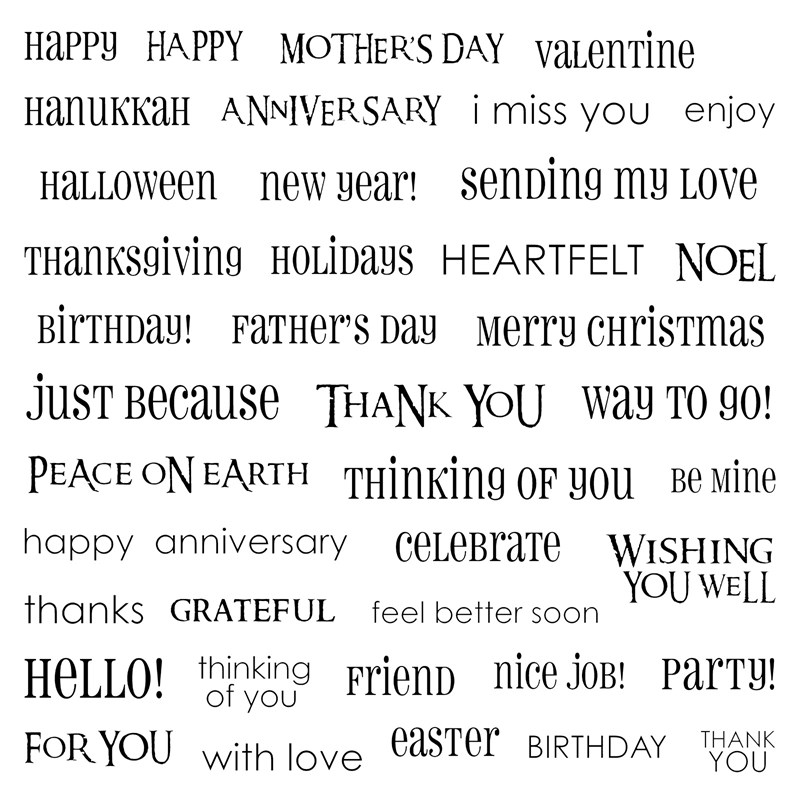
This month's Stamp of the Month is this adorable Owl set.  It has ONE lovey dovey sentiment that will get you inspired for Valentine's Day,*** but that's it.  
*** We're crafters and we need a couple months to get ready right?  
This way the big V-Day won't catch you off guard, you'll have 1 card at the ready. ***


You'll be shipped your kit a the end of the month or in early January.  
Be sure that you have Sapphire, Papaya and Sundance Inks and these 3 Tri-Blend Markers, Coral Blend, True Blue Blend & Gold Yellow Blend if you want to recreate these cards in the same colors.  

🧡🧡🧡

Speaking of Valentine's and getting your supplies in advance, today Close to My Heart launched Smitten. 


I'm really pleased how adorable this stamp set is.  AND VERSATILE!  
That Koala stamp set is so completely adorable.  I see stamp surgery in its future to make room inside the balloon for all kinds of other sentiments.  


While you're shopping be sure to check out the newest CTMH promotions, workshops, and  the  BRAND NEWEST IDEABOOK!!


At check out, make sure you add this and the current Nov-December Idea Book to your cart.  The first copy is free!  

Merry Making Ornaments 


Make merry this holiday season with delightful DIY wooden ornaments in four unique styles, including one shaker style!  

Deck the Palms


Add a tropical flair to your holiday celebrations with an exclusive collection of versatile products!

Remember Today


Plan ahead for 2022 with this innovative calendar project featuring beautiful Cut Above® layouts for each month of the year ahead!  This is also available as a scrapbook kit. See it here.

January Album Retreat


Get ready for our next virtual Album Retreat and treat yourself to three days of incredible creativity and artwork!

Don't forget to become a VIP!  
This is how Very Intelligent Papercrafters earn the Stamp of the Month for free and 15% back in rewards on every purchase!  

And there's exclusive VIP kits created just for you!

VIP Flower Shop Card Box


Treat yourself to this one-of-a-kind card kit available only to our VIP Customers and Close To My Heart Makers!  These make wonderful gifts!  There's no limit on the number of kits you can purchase.  See more info here.

Hip Hip Hooray Workshop


We’re celebrating the first complete year of our VIP Customer program with an exclusive workshop featuring papers, stickers, and stamps designed JUST for you!  I'll send you the instructions to the CTMH workshop when you purchase it.  And you can view a recording of the Virtual Workshop via the CTMH official workshop Facebook Group.  
  

I've also created a slimline card workshop with this kit.  I'll send you the instructions when you purchase it from me.  See this blog post for more info!  

With joy in my heart and coffee in my cup, have a wonderful day!


Thursday, May 7, 2020

Oh Poo!

Early last month, I showed this Eclipse technique on my Facebook page.  Then when I received my Though Thick & Thin stamp set which is part of the NSD Cardmaking Bundle #1, I knew I had to try it as well.  This bundle is while supplies last in May 2020.


Inside says, "Sorry Corona ruined your ____________"

In short, I random stamped a piece of cardstock. Die cut the sentiment and only colored the die cut. I then reassembled the pieces on a card front and elevated the letters with foam tape.

Clear as mud?  That's why I created a video.  The rose stamp shown in the video is currently available.  It's called the Yesterday & Today Cardmaking Stamp Set.


For the hi card, I used my Cricut.  I centered "hi" in the middle of a rectangle that's 3.75 x 5" on my Cricut mat.  With the letters in place on my Cricut Mat or taped with Washi tape on the back, I stamped the flowers.  You'll need an outline stamp that can be colored.  Stamp in a black ink that's compatible with the type of marker or colored pencil you're planning to use.

I used shimmer brushes on this set.

Supplies used in Oh Poo Card


More photos of the TP card kit.
This kit has supplies for 20 cards.  Just add ink & adhesives.

Saturday, September 14, 2019

Butterflies & Blooms Card Kit & Workshop

I must admit, I'm not ready for fall!  Besides, I believe beautiful cards are perfect to send every day of the year.  So with the newest of our paper collections, I've created this Butterfly & Blooms card kit & workshop.


I combined the Every Little Thing papers with the coordinating Vellum Die Cuts to make an easy but oh so gorgeous card set.  For half of my cards, I colored the vellum diecuts with our new Spectrum Noir TriBlend™ markers.  I used Lavender, Light Green & Citrus (Yellow) for the majority of the cards.   A couple I tried Jade Green & Purple.

The other half of the cards I didn't color the vellum die-cuts.  They are just as beautiful and even faster, simpler & easier!


Here's all 10 cards I created.


I must also mention that I LOVE this stamp set!  Say It In Style D1283 was my very FIRST CTMH stamp set and it has been re-released! 


You'll use it all year long! 


Here's your chance to make these cards!

Saturday, October 5th at 6pm in Everett, WA (my house)
Or Card Kit by Mail (it will not be stamped)

Kit Contains
Every Little Thing Vellum Die-cuts Z3521
Julep Glitter Gems Z3507
Pre-cut papers from Every Little Thing
Card bases & envelopes 5 or 10 of each

Cost 
$20 for 5 cards
$27 for 10 cards (2 sets of the 5 card designs)

Workshop Deadline is September 28th.  (You can order kits after this date but they may not be available until mid October)


These items are recommended if you're creating this set at home:
Say It In Style stamp set D1283 $18.95
Lavender TriBlend™ Marker Z2493 $7.50
Light Green TriBlend™ Marker Z2485 $7.50
Citrus (Yellow) TriBlend™ Marker Z2485 $7.50
Micro Glue Dots: Z2089 $7.50
Tombow Mono Glue:  Z3440 $4.95
Julep Exclusive Inks™  Pad
Wisteria Exclusive Inks™ Stamp Pad Z6514 9.95

Monday, July 23, 2018

Starburst Cards & Big Dies

Hello friends,  
Have you ever made a sunburst card?  I have several bursting cards to show you and a how-to video in today's post 


In this first card, I used an array of pink and red cardstock.  Our cardstock is now double sided which means the backside is a lighter version of the front.  (There's always been color on both sides).  This opens up so many wonderful options for new colors!  

To get started, you need 3 strips of paper each cut 1x12".  Then take them and cut them again so you have 5 & 7" segments. Now cut them diagonally to make long skinny triangles.  
You'll be glueing them down to a base sheet and grabbing your paper trimmer to clean up the edges.  

Here's the video showing you how I did it.  


Now let's talk about the very front of the card.  Aren't these dies amazing?  They make creating a birthday or thank you card so quick and easy.  

They cut cardstock, vellum, foils and glitter paper beautifully.  


Colors for our local Highschool.  I snipped off the candles.  I also made the sunburst panel 1/8" smaller overall so I could matte it in black.


Football colors!  You'll get to make this card at my Football Fan workshop https://www.facebook.com/CraftyLalia/events on Aug 21st.  Kits are available!  

Don't forget, when you spend $50 on my website in any month, you'll receive happy mail from me! Often, but not always, they are pre-cut card kits of some of the cards I've featured on this blog, but not always!  

With joy in my heart and coffee in my cup, have a great day!


Monday, June 12, 2017

Fidget Spinner Card

With fidget spinners being all the rage, I just *had* to make a fidget penny spinner!


This is the card I created for my son's birthday last week. I used the long retired Confetti Wishes blue paper and the new Willow Cardstock to give a Seahawks vibe!  

Creating in birthday - stealth mode, I didn't create a video, but a slideshow from still shots I took so he wouldn't hear me talking.  If I say "fidget," his ears perk up.

I used Sway, a Microsoft Office product, for this slideshow.  It was pretty simple to create but it appears that you'll need to manually click through it.  It will take a few seconds to load.  I'd love to know how it plays.  I actually thought it would export to an MP4 so I could upload it to a video.  


This is the link to the Design Space file that contains the slot.  The Fidget Spinner piece is an SVG file.  I cannot share this file if it contains the spinner because it's an uploaded SVG.  Use Detach prior to resizing.  Then click Attach again.  I didn't use Slice because I wanted the ability to adjust the size of the spinner hole.

This is the link to the Fidget Spinner SVG.  I sized it at 2.4" tall.  I also duplicated it and used the Hide Contour feature to hide all the inner circles on the black layer.

In reality, you can also use your paper trimmer to cut a rectangular slot with your paper trimmer.  Just make it about 1/16" taller than your foam dot.

Other penny spinners I've created:  This was a Stamp of the Month from May 2013!


And a round spinner with last year's Penelope paper


This is the link to the round slot.

All of these cards were designed using 3/8" 3D foam dots.  I used these dots.  They're 3/8" and 1/8" thick.  Some dots are super thick and make for a very bulky card.

You'll need plenty of 3D foam for making the layers.  DO NOT use the thin foam or you penny won't spin freely.  It's wonderful for cards, just not these cards.

I will be hosting a class making 3 of these cards, 2 slots & 1 circle style at my house on Tuesday, June 27th at 6:30.  I will also have kits and a video tutorial.  See my full list of classes here.  When you register, you can let me know if you have a preference on your spinner.  (Do they all need to be fidget spinners?)

With joy in my heart and coffee in my cup, have a wonderful day!


Thursday, May 18, 2017

Poo Emoji Card "Oh C..."

Yesterday morning I saw a trailer for "The Emoji Movie" that's coming out this summer.  Of course Poo is one of the characters in it.

I've known that the Artistry Cricut Cartridge has a shape that looks an awful like Poo so I hopped on Cricut Design Space, pulled up the Hot Chocolate cup (with whipped cream that looks like Poo) and went to work.


Now I've been trying to not say C-R-A-P so much lately so that's NOT what the inside of the card says.  

The outside of the card is stamped with the Ink Blot stamp in Tangerine.  It's a little more "pretty" looking in real life than I'm seeing it on my monitor.  This stamp is disappearing after a fun 2 years with CTMH as of July 31.  Grab it now!  


The inside of the card uses our Retired Sugar Rush paper and stamp. But GUESS WHAT???
There's still more of the Sugar Rush Stamp & Thin Cuts left in stock.  104 of them left as a few minutes ago.  Go... now!


Oh Cupcake!  
Donut know how I forgot your birthday!  


All of this card was created using the CTMH Artistry Cricut Bundle except for the cupcake wrapper which is from Art Philosophy.  I welded and designed it in Cricut Design Space 3 (beta).  This new update is fantastic for working with fonts.  

So go!  
Grab your Sugar Rush Stamp Set & Thin Cuts now.  My son thinks these dies are the coolest ever because one is shaped like a Pokeball from Pokemon!

When you place an order , you can opt in to receive a FREE Seasonal Expressions 2 Catalog.  There's tons of amazing goodness coming!  If I don't post here, you'll see it on my Instagram or Facebook Page.  


With joy in my heart and coffee in my cup, have a wonderful day!


Monday, April 17, 2017

I'm Hooked On You

Do yo have any fishermen in your life?  Here's two amazing cards for you tonight using the Hooked On You stamp set B1535.


This stamp set was introduced last fall in the Annual Inspirations catalog so it may not be around through this summer.

These beautful cards were created by sister consultants Jennifer Palmer (left card) and ???.  I don't have her name.  Hopefully I'll be able to update this post with her name soon!

With joy in my heart and coffee in my cup, have a wonderful day.
Lalia

Saturday, April 8, 2017

Triple Time Stamping with Live Beautifully

Hello and happy Saturday!
I'd love to introduce you to triple time stamping and give you a peek at the stamp and papers that will be featured next month!

This is a technique where you stamp on 3 layers of paper at one time.  Hence the name of Triple Time.


It looks more complicated than it really is which is my favorite part.

On this card, I used the Live Beautifully stamp set for the May 2017 National Scrapbooking Day (or Month) campaign from Close To My Heart.  When I first saw this stamp set I knew it would be great for this technique.  I like to use a large, fairly solid stamp for this technique because it does require me to push hard to stamp across the 3 layers of cardstock.  Usually I tell my friends, "don't perform CPR on your stamp (press down so hard on the stamp that it requires both hands).  You'll crush it and it and the image will be blurry."  In this technique, you want a sturdy stamp.

The stamp set used on this card will only be available May 1 thru 31 of 2017.  There's also a beautiful paper pack and scrapbook kit too.  Scroll to the bottom to see more.  In the meantime, here's a step by step tutorial.

There's 2 ways to cut your paper for this.  Many people start with a colored cardstock base and build up.

Not me.  I used a card base. I like my version because it uses less paper and there's more of the stamped image visible.  My upline & friend Michele Rowley showed me this trick of using less paper a few years back.  I've hung on to her card for years and recently put it in a safe place.  Of course that means I can't find it.  But I'm pretty sure the dimensions are the same.

White cardstock 
5.5 x 4.25 (or card base)
4.5 x 3.25
3.5 x 2.25

Notice how each one is 1" smaller?  That is key.  Knowing this, you can make a card of any dimension.  Square ones would be beautiful.

Now the colored cardstock/glitter paper.
The first one is .25" larger than the second layer of the white cardstock.
4.75 x 3.5
3.75 x 2.5. I used glitter paper on this layer.  It is also 1" smaller than the cardstock layer above it.

Now for the fun!

Set the colored cardstock side and grab some temporary adhesive.  Don't have any? Use a 1/4" of tape runner and rub your finger on it to lose most of its stickiness.

You'll be tacking the layers down temporarily.   Use just a tiny bit in the middle of each card.  I'm serious.  A half inch line of adhesive will be plenty.

Stack your 3 white cardstock layers.  Centering them as they'll be when finished.  Some people will tilt their pieces.  Let's stick to simple and centered today.

Let's start stamping.  I like to use fairly large and solid stamps for a project like this.  You'll be pressing hard.  Like doing CPR.  Baby stamps, like infants won't hold up under full chest commissions.


Stamp the flowers in a triangle configuration.  This looks random and natural.  I missed taking a pic of this until a step or two later. (see below)

I stamp on a solid surface with a piece if foam under the cardstock.  I use a scratch piece of paper to protect the foam from ink.  Foam doesn't soak up ink.  It will smear all over the next thing it touches.

Now check on the size of the gap between the layers.  It's ok to have a little. The cardstock will cover some of it.  If there's a large gap, press down again.  That's the beauty of clear blocks!  The area on the left had too much of a gap.  The light area is the ink still on the stamp that hasn't been transferred to the paper.  I pressed on the stamp again and it applied more ink to the card. (see next pic)


After stamping the 3 flowers, I needed to stamp the leaves.  I stamped a mask in a Post-it note and trimmed it out.  I was making a bunch of these cards so I made 3 masks and labeled them. I forgot to move the mask and stamped a stem across the flower accidentally.


Be sure to go across layers and off of the edge of the card.  White space is wonderful.  You don't need to fill every bit of the white paper.


The last thing I stamped was the sentiment.  I didn't stamp across layers for this.  I also didn't press hard because it would blur the image.

Next I pulled the 3 layers apart and rebuilt my card with the cardstock and glitter paper added back in.  I know that my papers are centered but I also paid attention to how the pattern lined up. I used glue dots to adhere the top layer to the glitter paper.  Glitter paper is rough and doesn't bond with a flat adhesive that well.


This is a fun and very flat card that mails beautifully.  Your friends will be impressed by your stamping prowess.  You don't have to tell them our secret.  You can let them think you're an amazing meticulous stamper who is an expert at lining things up.

Supplies used
White Daisy Cardstock
Sea Glass Cardstock, Glitter Paper, & Exclusive Ink (available now thru July 31, 2017)
Tangerine Exclusive Ink
Memento Tuxedo Black ink
Live Beautifully Stamp Set (Available May 1-31, 2017)


Here's what the full stamp set looks like.


It coordinated with the paper pack that is also only available in May.


In addition, there's a scrapbook kit!  There's pre-cut embellishments and preprinted designs that look like you spent hours cutting and designing.  It includes 10 pages to make 5 double page layouts!  Each page will actually take only a few minutes to assemble.  This kit is available 5/1/2017.


With joy in my heart and coffee in my cup, have a wonderful day!