Showing posts with label CTMH. Show all posts

Wednesday, May 18, 2022

Just a quick note & lots of photos to let you know about all the great things that CTMH has to offer in the month of May.  

It's not too late to celebrate National Scrapbooking Month with some amazing & exclusive kits.  These are all kits and only available through the end of May, while supplies last.


But first... You're invited! In 3 days I'm having a card workshop that's in my home.  These 4 cards & the Taco card shown below are the ones we'll be making.   Friday, 5/20 at 6:30 pm in Everett, WA.  Email me if you would like to come. The costs $15 for the evening of fun, learning and laughter.  

Can't come in May, add June 24th to your calendar for the next one.  


Kits kits & more kits in celebration of National Scrapbooking Day.

My favorites are the card kits because I love making cards!

Many Wishes Card kit use stencils and ink blending to create beautiful flowers.  

Here's what I created with the kit


A Toast To You is our second card kit.  Aren't these stamps adorable?  


Here's one card I created.  I swapped around the Toast & Taco.  


Good Vibes is an Exclusive Scrapbook Kit.  No Stamping Required.  It's simply adorable.  
More photos are on the website.  


Circles and Patterns Scrapbooking Workshop Kit is using the In Full Bloom papers which were so loved along with an amazing set of circle dies to create some fun layouts.  

Little Penguins Album Workshop Kit is the best 6x6 album!  It's fun colors make a vibrant album that's good for so many occasions.  And the penguins, they're so plentiful and adorable!  


The May Stamp of the Month kit!


This ready-to create kit will be yours (cards will be even more amazing than pictured) when you purchase the Stamp of the Month for $5  with at $50 order.  VIP customers get this stamp for free with their $50 order.  


Remember when I said that you get the Stamp of the Month for FREE when you're a VIP?  
This month is the last month to get this fun collection of acrylic shapes for free when you sign up as a VIP for the first time.  It retails for $19.95 and is only available to new & existing VIP members.  

Look at all of these shapes!  


There's a whole new catalog!


Tuesday, September 19, 2017

Christmas Cards Made Easy

I love hand made Christmas cards!  And I love having them done in advance of the holidays even more!

But sometimes, October and November are just as busy as December. I know this will be an issue for our family as we're signed up for a season of outdoor team sports this fall for the first time ever.  ((What was I thinking???))

But breathe.  These cards are amazing and so easy to assemble!  They beautiful just the way that Close to My Heart designed them.  But of course, I had to make them sparkle and shine just a bit more.


Introducing the Cut Above Merry Everything Card Kit.  In real life they aren't as washed out as the image in the kit but they're not quite as dark as they photo of my finished card.  They're much more balanced.


It contains the envelopes, pre-printed card base (saves you on bulkiness of your project) and ready to stamp circle with a gold foil outline.  

I added Bitty Sparkles, our amazingly brillianlt 2.5mm gems, and the new Bronze Sequins.
These packages of bling should be enough to embellish 2 packages of our 10 card kits just fine.

I used the Mistletoe Kisses stamp set M1182 with our new warm Nutmeg Brown ink to complement some of the stems in the greenery.  
 
Don't forget the Thin 3D Foam tape. It adds the perfect dimension without bulk to cards.  And it's Postmaster friendly for mailing!  

Want to come hang out and make these cards in October?  Place your order (or call me with your order) and bring them to one of my events.  I have events on Sunday, October 1, 2017 or Saturday evening of October 14, 2017.  You can find all of my Crafter Afternoon or Christmas Card evens on my Facebook Events page.  

(More card kits are coming!)


Saturday, March 4, 2017

Donut Z Fold Card

Who loves donuts on the weekends?  

Not me.  I like them every day. 😜


I created this Z Fold card for my January card workshop.  It's a pretty simple card to put together though there's extra folds.  


This card really is a cinch to put together.  The stamp set is from the Sugar Rush Cardmaking Bundle that includes thin cut dies that diecut the donut circle, frosting and the banner.  The grey "FUN SWEET YUM!" and the green hearts are the coordinating Sugar Rush Washi Tape!

And... this thin cut bundle is on SALE this month for just $17.96.  That makes the thin cuts just $4.01 more than buying the stamp set alone!  What a steal!


Below is an assembly video that gives all the details to create this card.
Below are the cardstock measurements
Cardstock:  5.5" wide and 11" long Score it at 2.75" and 5.5" from 1 end of the 11" wide piece.
Now cut a 1.25 x 11" wide strip from the scored cardstock.  The other piece will be 4.25 x 11 and the card base.
Front Panel 2.5" x 4"
Back Panel (donuts) 5.25" x 4"
White Daisy Cardstock for the Z-strip 5.25 x 1, 2.5 x 1, 2.5 x 1

NOTEs:  I like to score once when I'm making one or two of these cards.  If you like, you can score a 11x11 piece of cardstock and cut it into pieces to make 2 cards.  Either way, I will do all of my scoring before I cut the paper into strips for the card base and the Z-strip.
If you want to really conserve paper, make the base only 4x11 and you'll fit 3 card bases from 1 piece of cardstock and use a part of a second piece of cardstock to cut the 1.25x11 strips for the Z-strip.


This card folds flat for mailing.  It doesn't need any chunky embellishments and that makes my mail carrier so very happy!


For a little extra sparkle, I dotted the sprinkles with our CTMH Clear Shimmer Brush.  

So this month, get any of the CTMH Thin Cuts for 25% off!  

And don't forget, we have a Tea-rrific Stamp of the Month that is just $5 with a $50 purchase!  Sale and Clearance items count towards this purchase!  Isn't that wonderful?


Friday, December 4, 2015

White Pines Sampler

Thanks to a couple of my customers, I've been encouraged to keep creating art for the Shadow Box frame.  


This year's Christmas sampler was created with the White Pines My Reflections paper and Complements and the Artistry Cricut cartridge.  It was inspired by a couple pieces of artwork I've seen this fall created by Leesa Bartu.  

The White Pines paper is full of elegance and whimsy as you can see with the beautiful flowers and the cute forest critters.  

In making this sampler, I had TONS of complements (stickers, chipboard diecuts and clear accent pieces) left over so I'll make up a few gift tags too.  When I created the "Joy, Peace, Noel, Merry and Bright" background with the Artistry Cricut Cartridge I filled in the rest of the 12x12 piece of cardstock with simple tags shapes in my Cricut Design Space File.

Want this sampler?  You can order the White Pines Paper and Complements from my website and I'll send you the instructions and Cricut Design Space File. You'll also need clear sparkles and the Artistry Cartridge.  You can order a kit from me for $15 + shipping.
My kit will also include cut from Cranberry and Colonial White Cardstock and a few clear sparkles.

You will also need 3D foam tape, Liquid Glass and Bonding Memories adhesives to complete the project.

Contact me to order your sampler today.  Kits are only available while supplies last.  

Tuesday, November 10, 2015

Thanksgiving Place Cards

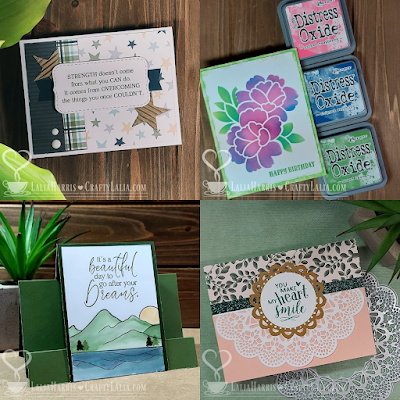
Here's the place cards I created based on yesterday's pyramid card.  They're so easy!


I used the Sangria papers this time and the Artistry Cricut Cartridge for the leaf & banner. 
Here's the Cricut Design Space file.  The acorn is from our Art Philosophy Cartridge.  
If you don't have Design Space and an Explore, the Banner is 1.25" tall, the leaf is 2" and the acorn is 1.25"

Step 1:  Cut 3 squares at 4"  (You can cut them at 3" for a smaller place card.)
Score them corner to corner in just 1 direction.  Fold lightly and open back up.

Step 2:  Overlap 2 of the squares half way.  The fold will line up with the edge of the other square.
Adhere with strong adhesive.  

When you pull the first triangle over the last one, you'll get what we call a tee pee or tent.

Time to embellish.  Cut square at 3.75" or 0.25" SMALLER than the base squares.
Now cut them into triangles.  
Our SureCut Fiskars paper trimmer is great for this.  The wire lines makes it so easy to line it up and know that you're getting a perfect cut.  I've used mine for 3 or 4 years now.  

Step 5 is to apply adhesive to the back.  I love using a dot adhesive and our All-Purpose Mat.  (Actually I use only half of our mat; it's so big that I cut it in half)
NOTHING sticks to it.  And if it does, it comes up really easily.  This helps me get adhesive to and over the edge of my paper without making a mess.  

Repeat on all 3 large triangles.  The last triangle gets a little bit of contrasting paper (or the same).  I cut a 1.5" square diagonally to get this little triangle.

Now it's time to make your project stand up.  

There's two ways to do it.  One is with our Hook & Loop Dots (We can't call them Velcro (TM) because they're not made by Velcro Industries)

Another way to secure your flap is to punch holes through the 3 layers and tie with some extra thick baker's twine.  


Now to embellish and enjoy!  


I used the Etched Alphabet to stamp my name on the banner in Pomegranate ink.  
I added a Gold Bling Gem for a bit of sparkle.

I created a smaller version starting with 3" squares of Kraft Cardstock.
The pattern paper is 2.75" with a 1" punched circle for the name from the Champagne Cardstock that is included in the Sangria paper pack and tied it closed with Poppy Extra Thick Twine.

If you are not going to re-use these place cards, you can also just adhere the flap with adhesive instead of tying or using our Hook & Loop Dots.  

Be sure to check my previous post to see my first pyramid card.


Tuesday, May 5, 2015

Birthday Sampler

How about a birthday sampler to celebrate each of your family members?

You may have seen it on my Facebook Page a couple months ago.  It may be "old" but I still have kits available!

I used the Confetti Wishes paper & Complements for this sampler.  The "Make A Wish" Scrapbook title was too big for the sampler so I created it as a banner.  This banner was inspired by my CTMH upline Michele Rowley's scrapbook layout.  

The center square can say "Birthday Boy" or "Birthday Girl."  I used our Hook & Loop Dots so they could be interchanged on the frame without causing any damage.  

They were created using the Artiste Cricut Cartridge.  

I had plenty of stickers left over and created 4 cards with most of the remaining complements.  If you look at these cards, you'll notice that they're created primarily with strips of paper.  They really do use up the leftover scraps.  


You can order a pre-cut kit for $25.  It will include a full color guide sent by email.

**Purchase link has been disabled**
----------------------------------------------------

My kits are easy to ship. $6 covers shipping on any number of kits you purchase.  
Kits can only be shipped within the United States   Order any time between now and July 2015.
Orders for kits will ship within 2 weeks of your order.

**Purchase link has been disabled**


Saturday, May 2, 2015

Blossom Seasonal Sampler

Check out the latest installment of my Seasonal Sampler series!

Last night I donated one of these samplers to an Operation Smile auction and it raised $110 towards the cost of an operation to correct cleft pallet or cleft lip.  Each surgery only costs $240 through this amazing organization.  I've never been to a CTMH event that has hosted an Operation Smile auction before.  It was a bit intimidating saying "I'll donate," not knowing if this is the type of item that would sell.  I was wondering if I'd have to bid on it myself just to get back the cost of the frame.   No bidding for me.  I was too busy hanging on to my seat as the bidding hit $80+ in just a few seconds.  Thank you Kelley for your generosity and your final bid!  
It was jaw dropping, inspiring and I was a bit teary eyed.  I'll be writing more about Operation Smile in future posts.  

I want to thank Michele Rowley, my upline, mentor and brainchild of these seasonal samplers.  We've been tag teaming on creating these samplers.  This one was her "baby."  I was going to sit this month out.  I think she knew exactly what she was doing when she send me a sneak peek of her  Blossom Sampler.  It was gorgeous.  I ran with the idea, added that beautiful banner and butterfly and here it is!  Thank you Michele for your inspiration for this year and giving me the nudge to design this one.

You don't have to spend that much to create your own piece of artwork.  This month, for just $20 you can create the 12x12 sampler and 5 cards with the leftover stickers and scraps.  The frame is $28.95 plus shipping & tax (about $34)

Here's the FIVE cards.  I've never had so many stickers leftover.  

We'll be stamping 3 of the cards using the new stamp set Finding the Words D1646.  Even the cute little butterflies on the last card are part of that set.  

We'll be using the following products
Blossom Paper Pack
Blossom Complements
Oceanside Sequins
Teal Shimmer Trim
Bitty Sparkles
Whisper Cardstock
Damask Embossing Folder
Lagoon & Sunset Inks

If you'd like to order a pre-cut kit, they are $20.  
Shipping for as many kits as you like is $6.  I'll cover any additional shipping.  

My in-home workshop is Saturday, May 16, 2015 at 7pm or you can order a kit to-go.  I have full color instructions on how to create this kit.  

If you're a DIYer, you can create this kit on your own.  Just order the $20 from my website and I'll send you the cutting instructions including a Cricut Explore Cricut Design Space link.  You'll have tons of paper left over after you've created this project.  You will need a scrap of Whisper and a 4x12 strip of Pear.  They aren't included in the paper pack.


You can order a pre-cut kit for $20.  It will include a full color guide sent by email.

**Purchase link has been disabled**

Saturday, April 18, 2015

Blossom Birdcage Card

Here's a pic of yesterday's creation...

The card is one of many on the Artfully Sent Cricut Cartridge.  The newest Cricut Cartridge from Close to My Heart.  It can be found on page 13 in the handbook.

I sized the card at 5.5" tall and it was a skinny 3.5 inches wide until I embellished it with a flower, leaves, and banner from the Art Philosophy Cricut Cartridge.  Now it looks like a full sized card yet fits in an A2 envelope.  I'll call that a win!

I used the new Blossom paper pack that is in the new Seasonal Expressions 2 catalog that just started at the beginning of the month.  

The flip side of this paper is that beautiful "canvas" that the card is laying on.  

The stamp set is "Typed Note" -- the April Stamp of the Month.  I really like this set because it has a TON of sentiments.  It's $5 with a $50 purchase or $17.95.  This set is a workhorse.  I'd pay the full price for a set of matching sentiments like this.  Either way, it's only available for the Month of April 2015.  

Did you see that this stamp set says "Happy Mother's Day."?  That's one of the sentiments that I'll be using on the inside of this card.  

I created this card on my Cricut Explore.  
Please use this design for your personal/workshop use, not for selling kits or cards.

You will need Art Philosophy and Artfully Sent to create this card.

I did modify the design quite a bit.  I changed it so the card base is Glacier cardstock by slicing and hiding contours.    Only the front will be cut from the Blossom B&T paper so it's easier to write on the inside.  There's also a little flower and leaves for the inside of the card.  I cut the stems off of the leaves just to save on paper.  

I'm linking this post up with this week's Color My Heart Color Dare Challenge # 138 because it features the colors of the Blossom paper pack.  
Hop on over there to see other creations.  

That's all for now!