Where there's teacups, there needs to be a teapot.
I have a fascination with making 3D papercrafts and it wasn't hard to find a 3D teapot to go along with the teacups found in the March Stamp of the Month--Tea-rrific!
I immediately thought of the Hello Lovely paper for a teapot with its beautiful floral print. The flowers reminded me of an English garden.
❤ Place a $40 order on my website and I'll send you a pre-cut kit for free!
❤ Purchase the SVG file from www.Cre8iveCutz.com and cut your own.
You'll need a Cricut Explore, Silhouette or another type of die-cutting machine that can cut SVG files to do this.
Tonight's post is a card using this week's Mojo Monday sketch along with the Stamp of the Month Tea-rrific.
I used the Dreamin' Big papers for the first time to create this fun card. Thinking back, I'm more of a coffee drinker so next time I think I'll leave the tea tag off.
I used Golden Yellow, Carmine & a blend of Warm Grey 4 (the lighter grey) and Turquoise Blue Shin Han Markers to color the tea-cups. I embellished my card with the Black & Gold Ribbon
Z3197.
Well, it's 15 minutes before the MOJO Monday deadline so I'll make this quick. I used Sketch MOJO486. And for once I actually followed it pretty carefully! You can hop on over to the Mojo Monday blog to see more entries and inspiration as well as many other card sketches.
This card was made with the Tea-rrific stamp set that is only available this month.
When you place an order for $50, you can receive this stamp set for just $5.
FREE CARD KIT!
To sweeten the deal, I'm sending a 5-card workshop to everyone who places a $55 order that includes this Stamp of the Month on my website this month. This kit will feature this card + 4 more using the Tea-rrific stamp set. You'll receive all the pre-cut pieces and embellishments to make these cards, including the card base & envelopes. You'll need the Tea-rrific stamp set S1703 and inks & blocks to complete the kit.
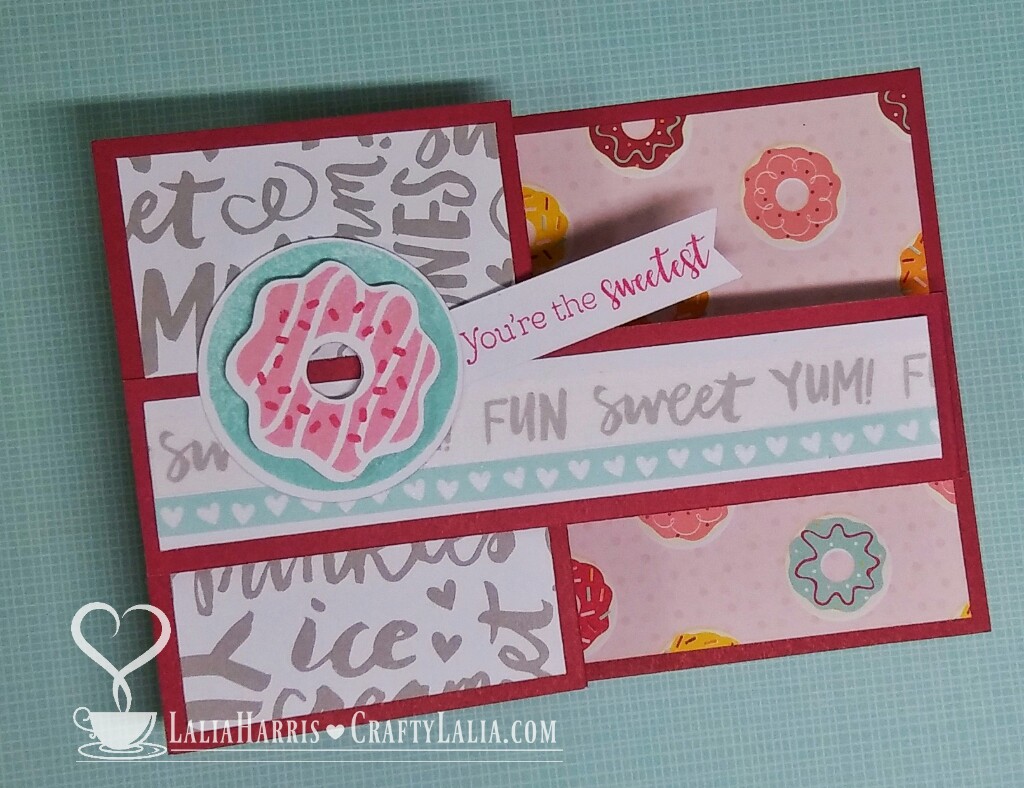
I created this Z Fold card for my January card workshop. It's a pretty simple card to put together though there's extra folds.
This card really is a cinch to put together. The stamp set is from the Sugar Rush Cardmaking Bundle that includes thin cut dies that diecut the donut circle, frosting and the banner. The grey "FUN SWEET YUM!" and the green hearts are the coordinating Sugar Rush Washi Tape!
And... this thin cut bundle is on SALE this month for just $17.96. That makes the thin cuts just $4.01 more than buying the stamp set alone! What a steal!
Below is an assembly video that gives all the details to create this card.
Below are the cardstock measurements
Cardstock: 5.5" wide and 11" long Score it at 2.75" and 5.5" from 1 end of the 11" wide piece.
Now cut a 1.25 x 11" wide strip from the scored cardstock. The other piece will be 4.25 x 11 and the card base.
Front Panel 2.5" x 4"
Back Panel (donuts) 5.25" x 4"
White Daisy Cardstock for the Z-strip 5.25 x 1, 2.5 x 1, 2.5 x 1
NOTEs: I like to score once when I'm making one or two of these cards. If you like, you can score a 11x11 piece of cardstock and cut it into pieces to make 2 cards. Either way, I will do all of my scoring before I cut the paper into strips for the card base and the Z-strip.
If you want to really conserve paper, make the base only 4x11 and you'll fit 3 card bases from 1 piece of cardstock and use a part of a second piece of cardstock to cut the 1.25x11 strips for the Z-strip.
This card folds flat for mailing. It doesn't need any chunky embellishments and that makes my mail carrier so very happy!
And don't forget, we have a Tea-rrific Stamp of the Month that is just $5 with a $50 purchase! Sale and Clearance items count towards this purchase! Isn't that wonderful?