Showing posts with label 2016AI. Show all posts

Thursday, June 1, 2017

A Foxy Hello

Happy June 1st!

Today I'm sharing with you a stationery folder I created using the new June Stamp of the month, Hello Foxy.


My kit is called A Foxy Hello because I don't want you to think that this is a romantic card kit.  
This stamp is just $5 with a $50 order this month.  Or $17.95 purchased on its own.  


I'm having a Crafter Afternoon on Sunday, June 25th at 3pm.  
Participants will create the folder and these 8 cards.  

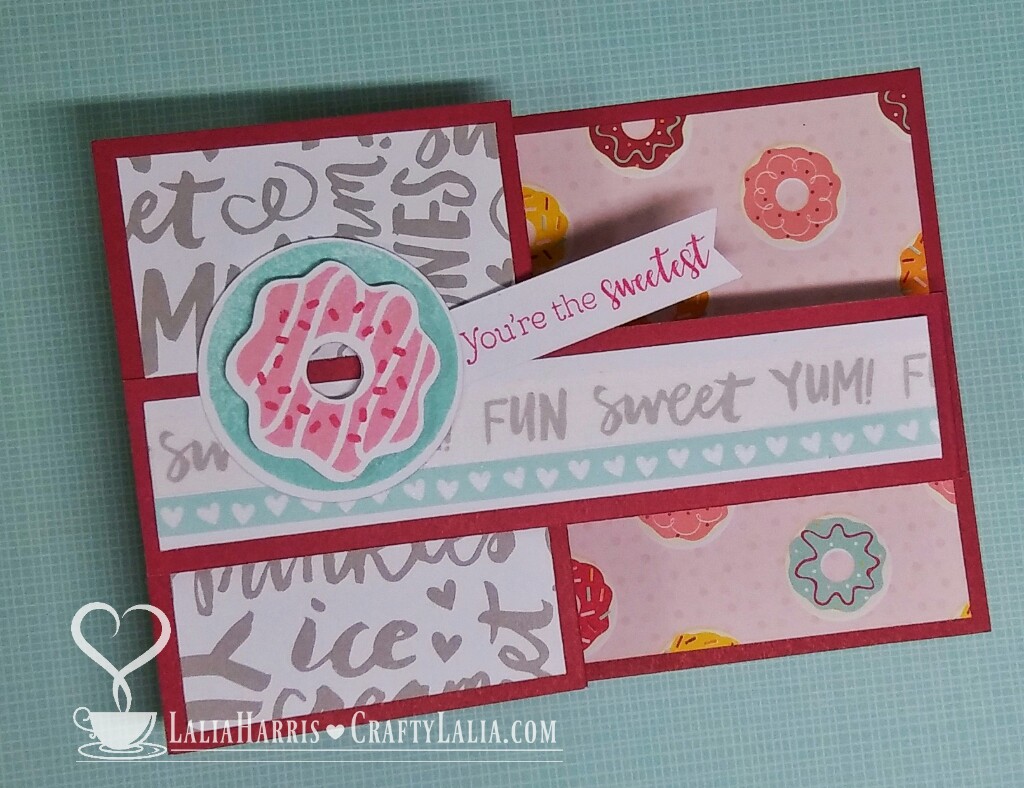
I used my favorite colors, Cranberry and Lagoon to accent these cards.


This card folder and the cards were designed by Cassie Ingersoll using another stamp set this winter. She's a sister CTMH consultant in New South Wales, Australia!  If you are part of Naomi's Connected Hearts team, you'll find the instructions in the Connected Hearts Facebook Group in the files.  


To complete these cards I use our Shin Han Markers, Gold Sequins, Journaling Pen and Extra Thin 3D foam tape to complete the cards.   All images were stamped with Memento Tuxedo Black ink because this is the best ink for working with alcohol markers.  

When you attend my workshop, you'll get a Journaling Pen & a full pack of Extra Thin 3D Foam tape in your kit.  

When you attend this workshop, you'll be able to any of my sentiment stamps to customize this kit to your needs.  
This card used the Cherry Pink instead of Carmine.  Both will work! 

Foxy Hello Card Kit - $20 
All pre-cut kits include the following
Extra supplies needed to complete this project (if not attending workshop)
  • Shin Han Markers Carmine (red), Leaf Green, Vivid Green, Golden Yellow, Marigold, Turquoise Blue.  Tender Pink and Pastel Peach are optional as they're used minimally.
  • Hello Foxy Stamp Set S1706
  • Memento Tuxedo Black Ink


I blended Marigold with Pastel Peach for the foxes.  I also used Pastel Peach on the fox face.

There's three ways to get this kit
  1. Attend my workshop on June 25th. Cost is $20, RSVP with Payment by June 18.
  2. Request a pre-stamped kit, local pick up or shipped $22, shipping $6.
  3. Place a $55 order on my website that includes S1706 Hello Foxy and Extra Thin 3D foam tape. You can receive the paper portion + sequins of this kit for $10 shipped.  (Journaling pen and 3D Foam Tape will not be included.  Kit will be unstamped) 

Message me to receive a PayPal invoice or my address to send a check.  Kits will be shipped the week of June 26 if your order is placed by June 18th.  Kits ordered in June after the 18th will be shipped by July 15th.

With joy in my heart and coffee in my cup, have a wonderful day!


Monday, March 6, 2017

Hello Lovely Teapot


Where there's teacups, there needs to be a teapot.

I have a fascination with making 3D papercrafts and it wasn't hard to find a 3D teapot to go along with the teacups found in the March Stamp of the Month--Tea-rrific!

I immediately thought of the Hello Lovely paper for a teapot with its beautiful floral print.  The flowers reminded me of an English garden.  

Want to make one of your own? 

Here's how:  
❤  Attend my March 30th workshop!
❤  Buy a pre-cut kit from me for $8 plus shipping.
❤  Place a $40 order on my website and I'll send you a pre-cut kit for free!
❤  Purchase the SVG file from www.Cre8iveCutz.com and cut your own.
 You'll need a Cricut Explore, Silhouette or another type of die-cutting machine that can cut SVG files to do this.


Some notes about my teapot version.
I made it as bigger than what is shown on the Cre8iveCuts website.  It is 6.5" tall.  The bowl is 5.5" in diameter.  It spans over 10" from handle to spout.  The lid is removable so you can put items inside.  The opening at the top is approximately 2.5".  The spout is functioning.  You can pour Skittles or other small dry items from it. (or small Lego pieces according to my son).


I simplified the lid by using a Scalloped Circle from Art Philosophy.
The base of my teapot is green.  If you receive a kit, it will match the lid.
This teapot takes one sheet of patterned paper for the "skin" of the pot plus 3 sheets of cardstock.
It took me about just under two hours to assemble my first tea-pot while watching Netflix.
I used Aleene's Turbo Tacky Glue.  I have found it at Michaels, Wal-Mart and JoAnn's.
Scotch also makes this fast grab glue that works. Use that link to see what it looks like.  ((It's currently overpriced on Amazon.))

Do not use double-sided tape for assembly.

If you use my Amazon link, I will receive a commission from their affiliate program.

Saturday, March 4, 2017

Donut Z Fold Card

Who loves donuts on the weekends?  

Not me.  I like them every day. 😜


I created this Z Fold card for my January card workshop.  It's a pretty simple card to put together though there's extra folds.  


This card really is a cinch to put together.  The stamp set is from the Sugar Rush Cardmaking Bundle that includes thin cut dies that diecut the donut circle, frosting and the banner.  The grey "FUN SWEET YUM!" and the green hearts are the coordinating Sugar Rush Washi Tape!

And... this thin cut bundle is on SALE this month for just $17.96.  That makes the thin cuts just $4.01 more than buying the stamp set alone!  What a steal!


Below is an assembly video that gives all the details to create this card.
Below are the cardstock measurements
Cardstock:  5.5" wide and 11" long Score it at 2.75" and 5.5" from 1 end of the 11" wide piece.
Now cut a 1.25 x 11" wide strip from the scored cardstock.  The other piece will be 4.25 x 11 and the card base.
Front Panel 2.5" x 4"
Back Panel (donuts) 5.25" x 4"
White Daisy Cardstock for the Z-strip 5.25 x 1, 2.5 x 1, 2.5 x 1

NOTEs:  I like to score once when I'm making one or two of these cards.  If you like, you can score a 11x11 piece of cardstock and cut it into pieces to make 2 cards.  Either way, I will do all of my scoring before I cut the paper into strips for the card base and the Z-strip.
If you want to really conserve paper, make the base only 4x11 and you'll fit 3 card bases from 1 piece of cardstock and use a part of a second piece of cardstock to cut the 1.25x11 strips for the Z-strip.


This card folds flat for mailing.  It doesn't need any chunky embellishments and that makes my mail carrier so very happy!


For a little extra sparkle, I dotted the sprinkles with our CTMH Clear Shimmer Brush.  

So this month, get any of the CTMH Thin Cuts for 25% off!  

And don't forget, we have a Tea-rrific Stamp of the Month that is just $5 with a $50 purchase!  Sale and Clearance items count towards this purchase!  Isn't that wonderful?


Tuesday, January 10, 2017

Celebrate Coffee with a Sampler!

Who loves coffee?  And donuts!  


The other day my girlfriend confessed to me that a piece on her Snowhaven sampler was lost.  "Want a snowflake to replace the missing snowflake?"  "How about a coffee cup instead?"  Done!

But I wasn't really done.  I've had a coffee themed sampler kicking around in the back of my mind for almost 2 years.  I decided to find my Cricut Design Space Files and give it another go.  
Now with the new Sugar Rush paper pack that's in the Jan - April Seasonal Expressions, I thought that coffee and donuts would be a sweet combo and it was!  


I used the January 2017 Stamp of the month "Adore You."  The heart and the phrase "you make me happy" were perfect for coffee.  Until I've had my coffee, I'm not ready to deal with the world with a happy mood.  


Some of the background squares are debossed with swirls.  Debossing is the same as embossing but you flip the piece over so most of the paper is raised and the design is lower in the paper.  I sanded it with our distressing kit to tone down the brightness and bring out the swirls.


Here's the words I've created for the sampler.  You can use any combination. 


To make this sampler on your own you need the following
3D Foam Tape
Clear Shimmer Brush (for steam and whipped cream)

This sampler uses the CTMH Artistry Cricut Bundle and Cricut Alphabet (free in Design Space).  My sampler shows a flower from Create A Critter but I've replaced it with one from Artistry in the file.  

If you want to completely DIY this project or there's two ways to get the kit instructions & Design Space File

Purchase $15 from my website (The paper pack & Shimmer brush are a perfect order!)
 or $7 via PayPal 

**Purchase link has been disabled**

With that you'll get full color photos emailed, the Design Space File and tips & tricks for cutting and assembly.  

To order a pre-cut ready-to-assemble kit to assemble on your own
Kits are $10 $12 and include all of the pre-cut pieces and twine.  

You can send me a check or use the PayPal link below.  

**Purchase link has been disabled**


I can mail you the pre-cut pieces & twine (Without the 12x12 background paper) for just $2.50 additional.  (That's $12.50)  If you need the White Daisy Cardstock for the background, please contact me with your zip code for a shipping quote.


Come & assemble this kit with friends!  I'm having an open workshop to work on this kit or the Welcome Home wreath kit on Saturday, February 4th at 6pm.  Please order this kit no later than January 24 if you are attending the workshop.

Fuss Free Workshop  $12 and will include use of adhesives & tools.


**Purchase link has been disabled**

I'll have another workshop day later in the spring for this kit as well.  

If you've made it down through all the details of my blog post, let me know by sharing which is your favorite coffee cup on the sampler.  💗


Thursday, January 5, 2017

First Card of the Year!

I pulled out my Hello Lovely paper yesterday morning after seeing my hunny off to work at 5 o'dark this morning on an extremely cold for us morning.  I needed to see some pretty spring papers!

As soon as I saw this floral print, I knew I wanted to make another V-pleated card similar to the one I created last spring.  You can see it and the tutorial for this card here.


I used the Ranunculus flower from Flower Market and the leaves from the Rose.

Here's my Design Space File for the flower.  
The tutorial & Design Space file for the folded portion is in this post.  
I cut the flower with Fern, Colonial White, Sorbet and the light Sorbet B&T from the paper pack.


I didn't need a lot embellishments so I used the new Gold Glitter Gems and a strip of  Rose Gold Foil Tape.


The Hello Lovely Paper Collection & Complements are available now thru April 30, 2017.


Don't forget about the Welcome Home Wreath that's only available this month. It's one of the most exciting promotions we've had in a long time and it's bound to sell out!

Wednesday, January 4, 2017

Welcome Home Wreath


Oh have you seen this wreath?

It's simply gorgeous!


Here's what you get in your kit.


All the pieces are double sided and read for you to punch out of the carrier sheet.  

For just $18.95!

I looked into replicating this kit using the Flower Market Cartridge.  Between supplies & time to cut it out.  I couldn't create a workshop for this price!  


All it takes is Liquid Glass to put it together.  I put a drop between each layer of the succulents and to adhere my rolled roses.  

You may want a few extras.  
Because who would *ever* put it together as shown.  😉


I inked the edges of all of my pieces in New England Ivy & Willow for the green pieces, Emerald for the bluish succulent and Raspberry for the Roses.  
And then I used the brand new Gold Shimmer Brush.  (This pen is AWESOME!!!)
And with green and gold all over my fingers I looked like a leprechaun. ☘💚 
And added some retired gold gems.  

I've heard if you assemble it as shown, it'll take a couple hours. 
If you assemble it with ink and rolling the petals and stepping over dogs and wrangling kids on a play-date with a bestie it may take you a bit  4-5 hours.  Either way, it's so worth it.  

I got mine for FREE!  Do you want to as well?

There's 3 ways to get it for free

💚Place a $60 order of current products on my website.  (You'll be prompted to add it to your cart for free and you get one for every $60 in qualifying product you order!)

💚Host a gathering (all new goodies to show your friends woo-hoo!)
With $250 gathering, you earn it free!  We can do an in-home or FB party!  Contact me to see how!
💚Sign up to be a new consultant this month!


Please don't wait to the end of January.  This kit has been extremely popular and may sell out.  

Tuesday, January 3, 2017

As they say... In with the new!


Hello 2017!

Let me introduce to you the new Seasonal Expressions Catalog!
It's filled with 4 new paper packs, 4 new scrapbook kit, 4 new Card Kits and much much more!   

We have lovely florals with Hello Lovely paper pack

A very versatile January Stamp of the month that's more than just hearts and love

Get a Sugar Rush from this sweet & whimsical paper & stamps called "Sugar Rush"

Sweet, isn't it?

And just in January...  AKA National Paper Crafting Month.


It's pre-cut, (just punch the pieces out) and ready for you to assemble.  All you'll need to add is Liquid Glass to put it together!

It's just $18.95 or FREE when you have $60 of current product in your cart.  
(You'll be prompted to add it for FREE when you qualify as you check out.  It won't magically appear in your cart.)  

Want to see the product in person?  Let's get together and I can show it to you over coffee!  


Wednesday, September 28, 2016

City Sidewalks Holiday Card Workshop


The City Sidewalks 20 card workshop is ready to go!
Like my fall workshop with Swan Lake, it uses just a quarter of a pack of the X7213B City Sidewalks My Reflections paper pack plus cardstock, extending this beauty to up 80 cards if you cut up a whole paper pack.

How to get it

  • RSVP w/ payment to one of my Saturday workshops on October 8th, 10-3pm or November 12th, 12-4pm
  • Order a pre-cut kit to pick up or arrive via mail
  • Order the supplies on my website and get the instructions for free.  

Want just the cutting diagrams and the ability to use this with your own friends & customers?  Keep reading!  Then hop on over to my website.


This snowflake is 3" in diameter!  And the silver glitter paper cuts beautifully without a lot of glitter floating around the house. This workshop uses the brand new Snowflake Thin Cut dies from Close to My Heart and just a little M-sized stamp set!

Here's the second snowflake.  It's a bit smaller at 2" but just as beautiful.

Workshop Details:
  • 20 cards:  3 each of 6 designs plus 2 of design #7 
  • 20 card bases & envelopes
  • All papers pre-cut
  • Includes your choice of M-sized stamp set
  • 1 pack of red enamel gems included (tons left over)
  • Cranberry & Peacock inks needed, available at my workshops
  • Full color assembly guide included.
  • Bring your favorite paper adhesive & mini-glue does
  • Place your order by Friday, October 28 & receive your choice of a second mini-stamp set for free!

Here's the 5 recommended stamp sets for this kit.  They're also available in Spanish & French.
View them on my website here and let me know when you place your order.

20 card kit: October 8 or November 12 or local pick up in Everett, WA 


Deadlines
Kindly order your kit at least 10 days before a workshop if at all possible so I have time to order supplies and cut your kit.  Kits will be shipped just after the 15th or 30th of the month, depending on when I receive the supplies for your order.  I may need to order your stamps and or snowflake thin cuts.  This kit will only be available until December 10, 2016.


DIYer & Consultant Guide Available:
If you'd like to create this workshop for yourself or your customers, place a $25 order on my website or use this PayPal link to receive the cutting guide, photos for assembly and consultant release.  Files will be sent to the email address on your PayPal receipt within a day, usually in just a few hours.  No items will be shipped.

**Purchase link has been disabled**

Thursday, September 22, 2016

Sneak Peek of my Christmas Card Workshop


Here's a sneak peek of my next workshop!
Make 3 of each design except for the green one on the right, you'll make 2 for a total of 20 cards!

Pre-cut, U-Cut & Consultant ready-to-teach kits will be available to order on October 1st!

Our new snowflakes look amazing when cut with our silver glitter paper.  Each kit comes with a full 12x12 sheet of glitter paper!

Leave a comment below with your email address (I won't publish your comment) if you want more details when this kit is fully released!

Thursday, August 25, 2016

Summer's End Blog hop

Hello friends!

Summer is winding down but I thought I'd leave you with a sweet taste of summer with these cards I created using the One in a Melon stamp set that's available for just a few more days.

If you're joining us from the Summer's End Blog Hop and came from Katy's blog, welcome!  Thank you for stopping by.

I love the cute little pineapples.  This is a Cricut shape on the Artistry Cricut Cartridge.  

Orange You Great! 
I used our now - retired Sunset Ink to make this simple yet wonderful card.  Our Rose Gold Foil Tape goes forever and ever and it's still available, for the next year at least!  I think you could make about 90 of these cards from 1 roll!  


Recognize the smaller melon?  It's really the orange slice!  

All of the watercolor backgrounds were made using our fabulous new medium round water brush and one shade of our watercolor paints.  It couldn't be easier and cleanup is super simple!  

Be sure to get your One In A Melon Stamp C1650 Set before the end of the month!


Thank you for stopping by, if you're hopping, your next stop is Amie's blog Mimi, Myself and I.


Saturday, August 6, 2016

Hello Adventure Fundamentals

Here's a lively birthday card! 
This was one of the very first stamp sets I saw in this new Idea Book.  I knew I had to have it. There's this great sentiment that says, "Birthday Wishes to the smartest person I know.... BESIDES ME."  


CTMH has had numerous build-a-cake stamp sets over the years but this is the FIRST one that's Cricut Compatible.  That was another excellent reason for me to grab it too.  It's called Wise Guy Birthday, not Wise Girl... what's up with that?  

Wise Guy Birthday is also available in Spanish and French!  
French.  Check out all 7 French sets here.  
and Spanish. Check out all 7 Spanish sets here.  

I used the delicious new Raspberry cardstock to complement the Adventure Fundamentals paper.  Isn't it fun and bright?  We also have new black glitter paper pack. All of our glitter paper contain 3 sheets of the SAME color!  It's going to be wonderful for big projects, Christmas cards and layouts.  

Sea Glass cardstock made its way into this card as well.  It's the new black.  Or the new gray.  Or the new 2016 Color of the Year.  Anyway you label it, it's wonderful!  

You'll be seeing a LOT more of this set as it's on my schedule for a card kit in early October!